When your sweet tooth is calling, there’s no better way to answer it than with some fudge. Rich, decadent and creamy, fudge is a guaranteed hit no matter the occasion.
But you don’t have to head out to a specialty candy shop or spend half a day making homemade fudge to get some. We’ll show you how to make a microwave fudge that’s so easy, you can throw it together on a weeknight.
By the way, these are our best fudge recipes.
Benefits of Microwave Fudge
When it comes to ease, microwave fudge is the way to go. Not only does it take less time than an old-school fudge (seriously, this recipe takes less than 5 minutes to make!) but it’s also great for those who don’t have a ton of candy-making experience.
Traditionally, fudge needs to be boiled, brought to the soft-ball stage, cooled and beaten, and it requires special tools like a candy thermometer. This microwave fudge recipe, however, only needs a bowl, spatula and 9×9 pan. How simple is that?
If you have some spare time or are feeling ambitious, learn how to make fudge the old-fashioned way.
How to Make Microwave Fudge
This incredibly easy microwave fudge recipe comes from Taste of Home reader Sue Tucker of South Carolina. Sue says, “You’re moments away from a pan of creamy fudge. Just microwave, stir and spread. This easy homemade fudge recipe is the best.” And we can’t help but agree!
Get Recipe
Ingredients
- 1-1/2 teaspoons plus 1 tablespoon butter, divided
- 2 cups semisweet chocolate chips
- 1 package (11-1/2 ounces) milk chocolate chips
- 1 can (14 ounces) sweetened condensed milk
- 1 teaspoon vanilla extract
Yield: About 81 pieces
Tools
- 9-in. square pan
- Foil
- Bowl
- Spoon or silicone spatula
Directions
Step 1: Prepare the Pan
Before you begin, line a 9×9 square pan with foil. Then spread about 1-1/2 teaspoons of butter over the foil, paying special attention to the corners. This will make the fudge much easier to remove once it has set.
Step 2: Melt the Chocolate
To a large, microwave-safe bowl, add the remaining butter and chocolate chips, then microwave for one minute. Remove the bowl and give the butter and chocolate a good mix. Continue to microwave and stir the mixture in 30-second intervals until the chocolate chips have completely melted.
Test Kitchen Tip: Start your recipe off right by using one of our Test Kitchen-preferred chocolate chip brands.
Step 3: Add Remaining Ingredients
While the melted chocolate is still hot, stir in the sweetened condensed milk and vanilla extract, and mix until they’re fully incorporated.
Step 4: Transfer and Cool
Spread the fudge in your prepared pan and place it in your refrigerator until the fudge is firm.
Test Kitchen Tip: If you’d like to add any toppings to your fudge, like chopped nuts, do so before putting it in the fridge.
Step 5: Slice and Serve
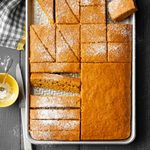
Once the fudge has set, use the foil lining to lift it out of the pan. Cut the fudge into bite-sized pieces and treat your sweet tooth!
How to Store Microwave Fudge
If you have leftover fudge, place it in an airtight container and store it in the fridge for up to three weeks. Here’s more info on how long fudge lasts at different temperatures.
How to Customize Your Microwave Fudge
Once you’ve mastered microwave fudge, make it your own. Here are some of our favorite fudge toppings:
- Chopped peanuts, almonds or walnuts
- Crushed cookies or candy bars
- Sprinkles
- Peanut butter or marshmallow fluff swirl
- Dried fruit
- Glazed bacon
- Almond or orange extract
- Espresso
Common Microwave Fudge Questions
How Do You Fix Microwave Fudge?
If your microwave fudge didn’t turn out how you’d expect, there are a couple of things that could be responsible.
The first would be that the chocolate was overcooked by the microwave. Since microwave power varies from unit to unit, a minute and a half of zapping could be too powerful and turn your chocolate grainy. To revive it, add a tablespoon more butter or additional chocolate chips and stir. This should return the mixture to a smooth, creamy texture.
If your chocolate was burnt in the microwave, however, it’s best to toss the chocolate and start over.
Another issue could be that sweetened condensed milk was swapped for regular milk or a milk alternative, resulting in a runny fudge. Sweetened condensed milk is milk that has had its excess water removed and sugar added, resulting in a thick, glue-like texture. This thickness is important to this microwave fudge recipe as it helps solidify and stable the fudge. The best way to avoid this mistake is to stick to sweetened condensed milk, or use evaporated milk and add your own sweetener.
Check out these other common fudge mistakes and how to fix them.
What Can I Do With Fudge That Won’t Set?
If you used the correct ingredients and method but your fudge still didn’t set up, don’t toss it! Instead, use it to top a bowl of ice cream or spread it between cake layers for a fudgy filling. Or you can eat it with a spoon, we won’t judge.
Next, take a look at these fun gift shop fudge recipes.
Three-Chocolate Fudge
I make this fudge at Christmastime to give to friends and neighbors. That tradition started years ago when I made more candy than my husband, three sons and I could eat, so we shared it. It's a tasty tradition I'm glad to continue. —Betty Grantham, Hanceville, Alabama
Get Recipe
Check out our
best fudge recipes, too.
Fudge-Topped BrowniesIf you love brownies
and fudge, why not combine the two? Mix up a pan of these exquisite brownies for any holiday or special gathering—or just when you want to treat yourself to the ultimate chocolate dessert.
—Judy Olson, Whitecourt, Alberta
Butterscotch Pumpkin FudgeEach one of these creamy, heartwarming treats is like a bite-sized pumpkin pie. —Kathleen Henne, Camp Hill, Pennsylvania
By the way, this is
how long fudge lasts.
Nana's Rocky Road FudgeWe make rocky road-style fudge every Christmas, but why wait until the holidays for a recipe this good? —Ashley Berry, Montgomery Village, Maryland
Black Cherry Swirl FudgeThis colorful treat is sure to satisfy the sweetest tooth in any family! It's always been a favorite with my nine kids, eight grandkids and my Bible study group. I vary the soft-drink flavors to get colors that match other holidays during the year. —Pauletta Bushnell, Lebanon, Oregon
Marshmallow FudgeYou'll find it nearly impossible to resist this rich chocolate delight. It's chock-full of marshmallows and graham crackers—and no one will believe that the tantalizing treat is low in fat. —Holly Mann, Temple, New Hampshire
Curry-Kissed Coconut FudgeIf you love Thai flavors and love fudge, you'll adore this creamy coconut fudge sprinkled with a hint of sweet curry powder. —Sarah Meuser, New Milford, Connecticut
Candy Bar FudgeMy manager at work, who knows I like to try new treat recipes, shared this one with me. I've made this chewy and chocolaty fudge many times since. Packed with nuts and caramel, it's like a candy bar. Everyone who's tried it loves it. —Lois Freeman, Oxford, Michigan
Peppermint FudgeI make many batches of this minty peppermint fudge to give as Christmas gifts. It's not too sweet, so it appeals to lots of palates. —Sue Schindler, Barnesville, Minnesota
Tootsie Roll FudgeWhen my husband came home with 50 pounds of Tootsie Rolls he bought at a discount store, I had to figure out a way to use them—so I came up with this Tootsie Roll fudge recipe! A red or green M&M's candy atop each piece makes them extra jolly. —Carolyn McDill, Ohatchee, Alabama
White Pecan FudgeEach Christmas, I package batches of this rich fudge to send to family and friends. It's just delicious! —Marie Draper, Price, Utah
Kahlua FudgeThis five-ingredient recipe makes serving up treats easy and scrumptious. —Laura Hanks, Harleysville, Pennsylvania
Simple Macadamia Nut FudgeMy aunt now lives in Hawaii, and she keeps our family supplied with fresh pineapples, mangos and macadamia nuts...along with recipes like this one. When I run out of macadamias for candy-making, I substitute pecans. Whichever nuts I use, neighbors like this fudge so much that they have started to call me the "Candy Lady of Cleveland." —Vicki Fioranelli, Cleveland, Mississippi
Peppermint FudgeThree of the season's best flavors-nuts, chocolate and peppermint-combine in a delightful manner in this scrumptious fudge. The two distinct layers are eye-catching-another reason why this candy makes a great holiday gift. —Connie Denmark, St. Joseph, Illinois
Mackinac FudgeWhen I got married, a woman at my parents’ church gave me this version of a popular Michigan treat. I sometimes pipe a bit of frosting onto each piece for decoration during the holidays. —Kristen Ekhoff, Akron, Indiana
Marbled Orange FudgeThis decadent treat doesn't last long at our house. The Creamsicle flavor of this soft fudge brings on the smiles. Bright orange and marshmallow swirls make it a perfect takealong for events and get-togethers. —Diane Wampler, Morristown, Tennessee
Cookies 'n' Cream FudgeI invented this confection for a bake sale at our children's school. Boy, was it a hit! The crunchy chunks of sandwich cookie soften a bit as the mixture mellows. It's so sweet that one panful serves a crowd. —Laura Lane, Richmond, Virginia
Gumdrop FudgeMaking candy is one of my favorite things to do during the holidays. This sweet white fudge is as easy to put together as it is beautiful to serve. —Jennifer Short, Omaha, Nebraska
My Christmas FudgeThis fudge is virtually foolproof and so creamy you won't believe it. I've searched for years for the richest fudge, and this one does it for me. You can add just about anything you like to customize it.—Barbara Miller, Oakdale, Minnesota
Red Velvet Candy Cane FudgeMy favorite kind of cake, red velvet, inspired me to create this fudge. If you'd like, spoon the candy mixture into paper-lined mini-muffin cups instead of spreading it into a pan. —Crystal Schlueter, Northglenn, Colorado
Mama's Million-Dollar FudgeNo other fudge I've tasted comes close to the smooth, chocolate taste of this million-dollar fudge recipe, which my mother-in-law introduced me to one Christmas (I've never been able to make it as good as she does, though). Since it makes such a large batch, I always save some for last-minute gifts. —Gloria Heidner, Elk River, Minnesota
Cherry Swirl FudgeFor festive fudge with a new "twist," give this confection a whirl! We used vanilla chips instead of chocolate ones and added sweet cherry flavoring. —Taste of Home Test Kitchen
Chocolate Caramel CandyThis dazzling treat tastes like a homemade Snickers bar and has flavor beyond compare. When I entered it in a recipe contest at our harvest festival, it won five ribbons, including grand prize and the judges' special award. —Jane Meek, Pahrump, Nevada
Easy Peanut Butter FudgeMy sister shared the recipe for this unbelievably easy peanut butter fudge with marshmallow cream. I prefer using creamy peanut butter for this mouthwatering dessert, but the chunky style works just as well. —Mary Jane Rummel, Linglestown, Pennsylvania
Butter Pecan FudgeToasted pecans add a nutty crunch to this creamy fudge, perfect for holiday giving. People always seem to rave about its wonderful caramel flavor. —Pam Smith, Alta Loma, California
Maple-Bacon White Chocolate FudgeTired of the same old fudge? Try my recipe with white chips, maple flavoring and bacon. Then be prepared to share the recipe. —Mindie Hilton, Susanville, California
Almond Cherry FudgeCooked in the microwave, this fast fudge is a sweet addition to any holiday gathering. I make it when I need a quick treat for a school party or to take to a neighbor. —Shellie Tucker, Hendersonvlle, Tennessee
Double Chocolate Walnut FudgeAnyone who's fond of chocolate will like this smooth, nutty fudge twice as much. I enjoy making several batches when Christmas rolls around. It doesn't last long at our house during the December festivities! —Florence Hasty, Louisiana, Missouri
Ribbon Fantasy FudgeI developed this recipe especially for my husband, who likes anything that has chocolate and peanut butter together!
Holiday White Chocolate FudgeWhen December arrives, friends and family eagerly await my creamy white fudge. It's a little something different from the traditional chocolate. —Gioviana Buser, Riverside, California
Penuche FudgeThis is a favorite recipe that has been in our family for over 20 years. My aunt taught me
how to make homemade fudge when I was 12 years old and I am still making it today. —Jhana Seidler, Venice, Florida
Apricot-Nut White FudgeWe look forward to this luscious apricot fudge recipe every Christmas. It's easy to make, and it melts in your mouth. I wrap up small squares of the candy with ribbon and silk holly.
Dark Chocolate Raspberry FudgeSomething about the combination of dark chocolate and raspberry is just so addicting. This fudge makes a heartfelt homemade gift, or just a treat that's worth sharing. —Barbara Lento, Houston, Pennsylvania
Peppermint Swirl FudgeIndulge in candy-shop flavor with these rich swirled squares. For Christmasy color, I add crushed peppermint candies and red food coloring. —Suzette Jury, Keene, California
Peanut Butter Fudge CupsMy husband often travels during the week, and this fast-to-fix microwave peanut butter fudge recipe is perfect for just my 2-year-old and me. —Lori Brow, Manhattan, Illinois.
 Updated: Mar. 29, 2022